

Not much to add. Dog tolerates it and price is good


Step 1: Gather the Right Tools
Step 2: Choose a Calm Moment
Step 3: Hold the Paw Gently
Step 4: Trim Only the Tip
Step 6: Watch Your Cat’s Body Language

Overall rating: 4.8 / 5 from 1134 reviews.
Not much to add. Dog tolerates it and price is good

This is the only flea medication that works for us where we live.

This on-line company is such a good find. They provide quality products at a good price with delivering them efficiently. Definitely recommend purchasing from them.

Items arrived on time and work great!

Love stronghold

Same product at a great price

Fast shipping great quality and price

We are happy with Heartgard Plus

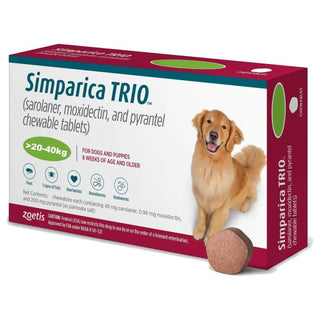
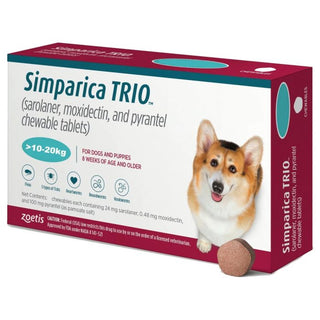
I’ve been using Symperica Trio for a yr now. Love it. 79 pets ships fast and prices are more affordable. Thank You

Right after a haircut. 6 year old dashund/shih Tzu mix

Great deal on flea/tick. Helps take care of my pup
Stronghold Violet For Dogs 5-10lbs (2.6-5kg)

Two sweet girlies decided to make our deck their home. Mosquitoes are a big problem where we live and we had to get them protected. This was the best bang for the buck. I’ve ordered from 79Pets several times and while delivery is not fast it is very consistent.
Revolution Plus For Medium Cats 5.6-11 lbs (2.6-5kg)

As a retired veterinary technician I was extremely happy to finally see a flea and heartworm medication that actually does tapeworms too!!!!!!! This is a 1st to my knowledge....I live in a tropical climate where fleas never die so this is heaven sent.
Nexgard Combo For Cats 5.5-16.5 lbs (2.5-7.5 kg)

Great for free delivery worldwide and it took shorter time than I expected. Thanks
Simparica Trio For Dogs 5.6-11 lbs (2.5-5 kg)

My dog is excited to have her Advocate given every month! Great customer service and we're already a returned customer!
Advocate (Advantage Multi) For Small Dog Upto 4kg 8.8lbs (4kg)

Great price, authentic quality and reliable shipping. Shipping takes a bit longer, since it is being shipped from abroad. But still a reliable service.
NexGard & Heartgard (Green) Combo Dogs 24-60 lbs (10-25 kg)

79 pets has great service, they resolved my issue when I purchased by mistake . Thank you!
Simparica Trio For Dogs 22.1-44 lbs (10-20 kg)

Very happy with the price of Stronghold heart worm med for my dog. Seems to be working well.
Stronghold Teal For Dogs 44-88lbs (20-40kg)

My dog loves this product, never got any issue. Good price , deliver on time. We will definitely keep purchasing with 79 pets.com. Thanks!
Simparica Trio For Dogs 22.1-44 lbs (10-20 kg)

Great customer service! Would definitely purchase from them again!
Advocate (Advantage Multi) For Small Dog Upto 4kg 8.8lbs (4kg)

My fur babies love being protected from fleas!
Stronghold Blue For Cats 5.7-15.5lbs (2.6-7.5kg)

No more fleas! I love it and my pets love it!
Stronghold Teal For Dogs 44-88lbs (20-40kg)

I have 3 of these little rascals so Michigan flea/tick season can be financially brutal! Thank you for keeping NexGard so affordable.
NexGard Chew For Small Dogs 10-24lbs (4-10kg)

it is so easy to order
NexGard & Heartgard (Brown) Combo Dogs 60-121 lbs (25-50 kg)

I have no difficulty to give the tablet to my dog. I want my shipping to come faster by the way.
NexGard Spectra For Small Dog 8-16 lbs (3.5-7.5kg)

Stronghold Plus keep my baby safe
Stronghold Plus For Large Cats 11 lbs to 22 lbs (5-10kg)

Thank You 79pets
Stronghold Plus For Medium Cats 5.5 lbs to 11 lbs (2.5-5kg)

Advocate can only be found here n it's easier to order online. Thanks 79!
Advocate (Advantage Multi) For Cats Over 8.8lbs (4kg)

Great product and price. Shipping updates helped, since product comes from abroad. I would definitely recommend and use it again.
NexGard & Heartgard (Green) Combo Dogs 24-60 lbs (10-25 kg)

Easy to give!
NexGard Spectra For Small Dog 8-16 lbs (3.5-7.5kg)

Stronghold Plus does exactly what it was advertised for. Effective and best product. Would highly recommend Stronghold Plus.
Stronghold Plus For Cats 5.5 lbs to 11 lbs (2.5-5kg) 3 Pack

After Seresto collars failed to get rid of fleas, I didn't know where to turn. I saw a post on a page I follow (Kentucky Kitty Cats) saying that they use Nexgard Combo for the cats they shelter. I decided to try it and IT WORKS!
Nexgard Combo for Cats 5.5-16.5 lbs (2.5-7.5 kg)

My kitty love Revolution. One of the best product for flea & ticks. Good price will definitely recommend this website.
Revolution Plus For Medium Cats 5.6-11 lbs (2.6-5kg)

Tried this the first time and the correct medication was sent on time to me. Will definitely use this site again. Thanks!
Simparica Chewables For Very Small Dogs 5.6-11 lbs (2.5-5kg)

Happy Kitty
Revolution Plus For Medium Cats 5.6-11 lbs (2.6-5kg)

As described. Value for money
Nexgard Chew Red for Large Dogs Flea & Tick 60-121 lbs. (25-50kg)

This is Lexi Marie! She was wondering why mom was so excited for buying flea medicine. I explained to her that we saved $100 and that she would understand some day when she grows up.
Revolution Plus For Large Cats 11.1-22lbs (5-10kg)

Received on time. Thank You 79Pets
Nexgard Chew Red for Large Dogs Flea & Tick 60-121 lbs. (25-50kg)

Very good experience!
Revolution Plus For Large Cats 11.1-22lbs (5-10kg)

Last year, I made a visit to the vet. I told them that Kattie/cat had ear mites. They gave me an ointment costing $80canadian. I used it up and purchased another bottle. $160. total not including the cost of the vet visit. No results. The ear mites have been there for a long time. Canadian vets have control of what is sold in Pet stores and you cannot purchase off the shelf products not recognized by them. I jumped at the chance to purchase your produce with a recommended 100% effectivity. I was willing to try, but was suspicions. After a month there was still a little scratching but after 6 weeks, the mites are gone and the scratching is gone. Thank you very much for this mite solution. I recommend it heartily. Harry P.S. Do not tell the Canadian vets as they will outlaw your product.
Revolution Plus For Medium Cats 5.6-11 lbs (2.6-5kg)